The knockdown kit for the Q-PAC Fan exists for a simple reason: not every jobsite can accommodate a fully assembled system. Whether you're working with tight corridors, irregular AHU bays, or simply need a more compact delivery method, the knockdown option gives you all the benefits of the multimotor plenum fan—just in a modular, field-assembled format.
Here’s how to get it from kit to commissioned without any guesswork.
Step 1: Install the Perimeter Angles
*Only required if your air handler doesn't already have a 5/8” - 1 1/4” flange.
- Start with the top angle. Align the angle to the cross-sectional width of the air handler.
- Align the blank flange of the angle with the cross section.
- Next, install the side angles, then the bottom angle, making sure they’re flush and square.
Tip: Use appropriate fasteners for your AHU walls—not included in the kit.
Step 2: Assemble the Fan Frame Panels
Each panel is labeled and goes Left to Right in numerical order (1 → 2 → 3…)
- Seat Panel 1 first. The flat surface of the frame panel should rest on the air handler floor, with the formed channel seat on the angle/flange.
- Nest the flange of successive panels into the channel of the preceding panel. Fasten the panels together using the vertical set of channel holes to draw the panels together.
- Fasten the corners of the panels to the Perimeter Angles to hold in place until all panels are installed.
Tip: Don't fully tighten the screws until all panels are installed in case adjustment is needed to fit the air handler. Once all panels are installed, finish fastening all channel and perimeter screws.
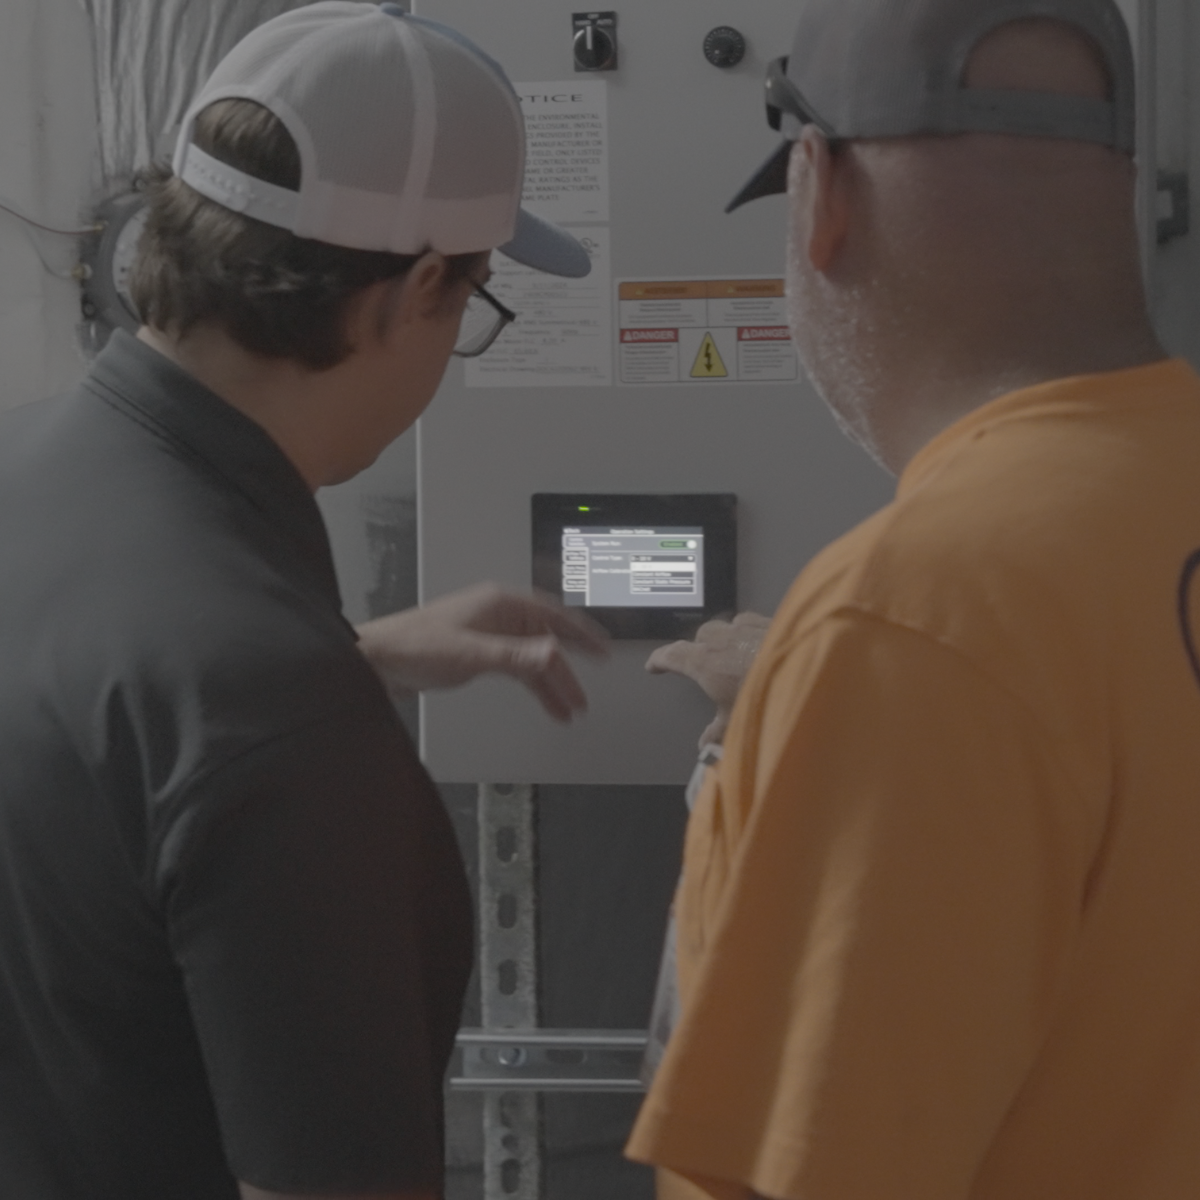
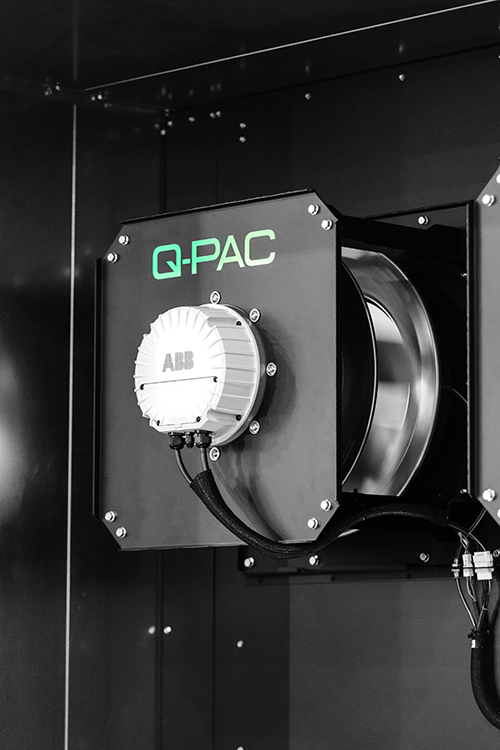
Step 3: Mount the Fan Controller
Align the Fan Controller with the panel cutouts, on either the left or right of the fan frame as requested in the design.
- Line up the pressure nozzle with the hexagonal cutout.
- Make sure the cable ports face inward toward the center of the air handler.
- Secure with four self-drilling screws (provided).
Tip: Double-check orientation before driving fasteners—you only want to do this once.
Step 4: Route and Secure the Frame Harnesses
- Insert cable tie mounts into the pre-punched ¼” holes. Lightly loop and close each tie—don’t cinch yet.
- Route the frame harnesses through the looped cable ties
- Match each labeled harness to its plug fan number and plug locations.
- Once everything’s routed and connected, tighten the ties and snip the excess.
Tip: The pressure tubing may need trimming for cleaner routing.
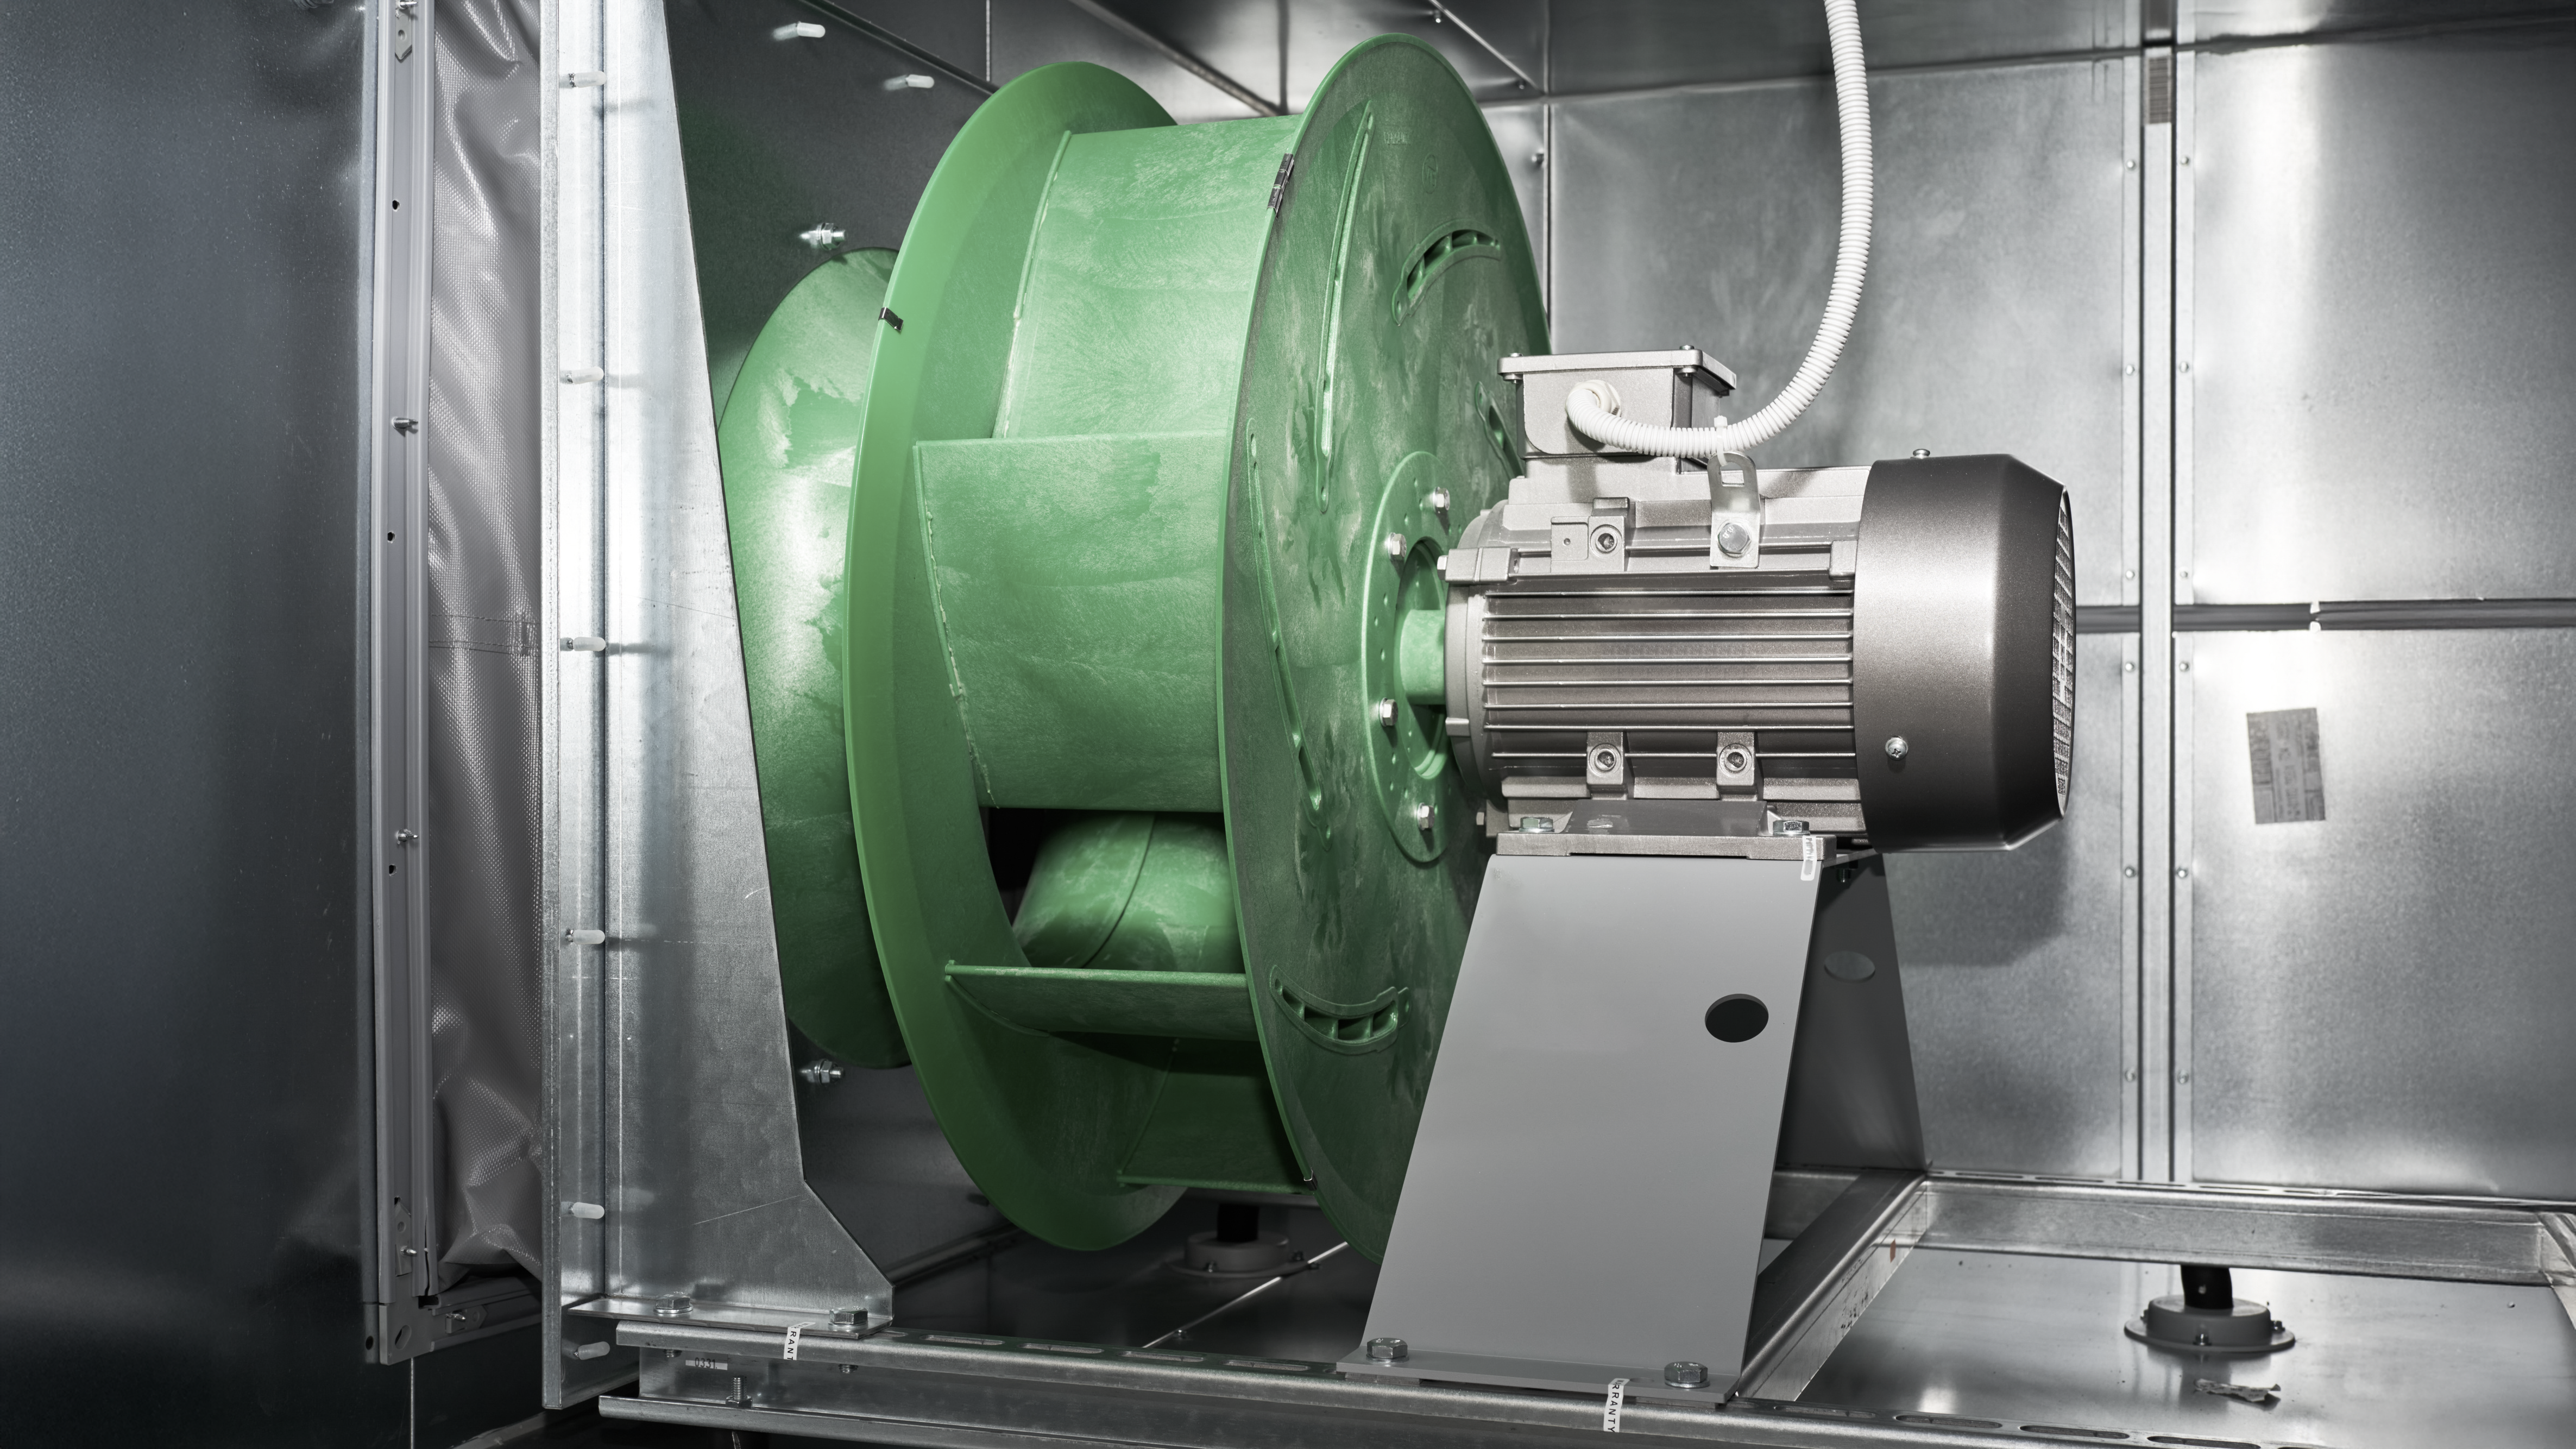
Step 5: Install the Plug Fans
- Mount the plug fans with the included hex serrated flange bolts.
- Carefully lift and seat each fan on the fan ledge, then hand-tighten bolts it into place. Secure with impact driver once bolts are started.
- Connect the plug fan to the frame harness—power and pressure tubing.
Tip: These fans can weigh up to 140 lbs. Use proper lifting technique or gear.
Step 6: Confirm Final Assembly
Once all plug fans are installed and wired:
- Double-check each harness connection.
- Verify the Fan Controller and pressure nozzle are seated cleanly.
- Refer to the assembly diagrams to confirm correct routing.
Reminder: If installing multiple Q-PAC Fans, repeat the steps and refer to Appendix A for Coupler installation.
Wrap-Up: Assembly Designed to Respect Your Time
This isn’t a cobbled-together system. The knockdown kit was designed for straightforward field installation, with labeled components, pre-punched routing paths, and no need for special tools or wiring gymnastics. You can assemble it on-site without compromising on fit, finish, or function.
When you’re done, what you’ve built is a commercial-grade, AHU-agnostic, fully resilient multimotor plenum fan—wired and ready to work like it’s always been there.